
Master Mi Members
-
Posts
436 -
Joined
-
Last visited
-
Days Won
8
1 Follower

Recent Profile Visitors
30,814 profile views


Master Mi's Achievements
")
Collaborator (7/14)
-
 Rare
Rare
-
 Rare
Rare
-
 Rare
Rare
-
 Rare
Rare
-
 Rare
Rare
Recent Badges
-
 Ridiculously Garrett reacted to a post in a topic:
Sonic Advance 3 - Staff Roll R&B/Hip Hop
Ridiculously Garrett reacted to a post in a topic:
Sonic Advance 3 - Staff Roll R&B/Hip Hop
-
Master Mi reacted to a post in a topic:
Brandish - The Cursed King Remix
-

Sonic Advance 3 - Staff Roll R&B/Hip Hop
Master Mi replied to Ridiculously Garrett's topic in Post Your Game ReMixes!
"The bar was kinda crowded. Like the slave quarters of Rupture Farms. But that's a different story from another game. Couldn't even catch a glimpse of Robo Eggman and his big band through the thick clouds of smoke. Things were starting to get hot. So I went to the bar and ordered a hedgehog-friendly tuna shake. I sipped the glass slowly... ... and, of course, I reserved a pool table in the back corner of the bar to play a smooth casual game with my spiky-haired cutie and the affectionate, fluffy fox."- 1 reply
-
- 1
-
-
Troyificus reacted to a post in a topic:
Psycho Pinball - The Monster Mix
-
Master Mi reacted to a post in a topic:
Sonic Advance 3 - Staff Roll R&B/Hip Hop
-
Epic stuff, dude! And really good mixing as well. The only thing you could still fix for this really cinematic remix composition is the way too abrupt ending of the last notes. Maybe, it's just a video issue that chopped the last notes - but I'd let these notes fade out way more slowly for the final submission track. Hope you are going to submit this title, aren't you?
-
Definitely a worthy upgrade of the original soundtrack. But for submission to OCR, I don't think it will suffice in terms of composition efforts as a mere arrangement. If that's your ambition, I'd at least compose something like an atmosheric intro (maybe something with some sort of a knightly fanfare), at least one little break around the middle of the soundtrack (where the remix could lead into a different musical structure for a few moments), and (optionally) maybe a little outro. Mixing seems to be good so far. The only thing that seemed a bit strange to me was in the beginning after minute 0:09, where the electric guitars around the center of the panorama sound kinda squashed together with the drums.
-
Master Mi reacted to a post in a topic:
Brandish - The Cursed King Remix
-
I'm not familiar with the game or the original music in any way. But the remix sounds like a really good and humorous upgrade of the original soundtrack. The mixing also makes a really good impression. It is also something really different in terms of genre. So I would definitely submit it and give it to the judges at OCR for evaluation. ))
- 1 reply
-
- 1
-
-
Master Mi reacted to a post in a topic:
Psycho Pinball - The Monster Mix
-
This guy is quite the personified one-man invasion of a multi-instrumentalist with the estimated energy supply of a faithful energizer bunny: Love the southern style with the energetic and joyful vibes, the radically lively instrumentation of the brass as well as the well-placed “eat the rich” message in the background. It might be fun to implement something like the ska genre into some future remixes on OCR to further increase the musical variety. With music like this, you can easily support the good ol' summer days or radically shake some dark warlord armies out of their stiff marching beat 'n' make 'em stumble over their own stinky cheese feet. ))
-
paradiddlesjosh reacted to an 8Track:
Older than mold, yet shinier than gold
-
derezr reacted to an 8Track:
Older than mold, yet shinier than gold
-
I allowed myself to put some of my favourite gems from the good ol' days of OCRemix in the 8Track treasure chest. Enjoy. ))
-
Master Mi reacted to a post in a topic:
Sonic: His World + original || Orchestration by ear by Peshtiwar Botani (FLP+MIDI IN DESCRIPTION)
-
@Rozovian Got a brand-new version of my remix and I would really love to hear/read your feedback on this one (especially in comparison to the last remix version) since I put huge efforts in this new version (description of the biggest changes in terms of composition and mixing you can find in my comment above). You might not remember how the old remix version sounded like. But I kept a SoundCloud upload of the old version (I guess I will still keep it for at least one or two further months). Old remix version: 1.2 >>> New remix version: 1.3 >>> ... I really think about submitting this new version to the OC judges. But I still want to get a few impressions from the other remixers and listeners before. You also said that I should make a louder version which is on a similar loudness level like other OC remixes. I'm not really a big fan of getting involved in modern loudness wars since they do a lot to kill the dynamics of the music. That's why I favour the loudness recommendations of the EBU R 128 standards with a consistent target loudness level of around -23 LUFS (-23 dBFS) - with the help of this, you will never get into trouble with signal peaks and dynamics. And I also use it to bring all my own remixes and compositions on a standardized loudness level (so you will never have to touch the volume knob when listening to my uploaded audio content - wish they would implement this loudness standard not just at broadcasting but also for all steaming services and their whole audio content in the near future). But as long as it doesn't mess up my dynamic mixing concept I called "Life Force", I could create a louder version for OCRemix without using any compressors or limiters that might destroy dynamics, transients and degrade the sound quality. The measurements for the new version of this remix in my DAW show me a really safe maximum true peak value of around -7 dBTP. This means that the highest peak signal throughout the whole soundtrack just scratches around -7 dB (way below the 0 dB mark that should never be exceeded to avoid clipping and ensure a clean music production). So I think I could safely create a remix version for OCRemix which is about 6 dB louder (with a target loudness level of around -17 dBFS) than my own version without messing up my dynamic mixing concept. And it would sound like this in terms of loudness (be careful with the loudness jump, especially when using headphones): CC - FF7 Remix (Excerpt) - Plus 6 DB OCRemix Version.mp3 This should be around the loudness level of the really dynamic mixes of RebeccaETripp, a kinda famous composer on OCRemix. So what do you think?
-
Master Mi reacted to a post in a topic:
Crisis Core - Final Fantasy 7 - Wings Of Freedom (Master Mi Remix)
-
Uploaded attachments got infinite ammo bandana?
Master Mi replied to Master Mi's topic in Site Issues & Feedback
Thanks. )) Have you already found any hints regarding the display of the remaining upload limit? As far as I remember correctly, this was previously always displayed somewhere on your own profile page or maybe at the logged-in account display under "Content" >>> “My Attachments”. -
Master Mi reacted to a post in a topic:
Uploaded attachments got infinite ammo bandana?
-
For media files uploaded to OCRemix, such as images and audio files, I have always checked from time to time how much I have already exhausted my upload limit for attachments in posts or to decide how much I want to compress this media data. When I checked my last uploads of attachments, I could no longer see any such upload limit. Does this mean that this upload limit restriction has now been lifted?
-
pixelseph reacted to a post in a topic:
Help! My Guitar/Bass Tone Sucks!
-
Help! My Guitar/Bass Tone Sucks!
Master Mi replied to pixelseph's topic in Music Composition & Production
@pixelseph Yo, dude, I finally finished the guitar part and the whole remix project. Gave some of my best shots in terms of my momentary composing, instrumental and mixing skills. So I'm really lookin' forward to your critical opinion of a professional guitarist. )) I posted the full version of my remix in the forum "Post Your Game ReMixes!". The remix is called "Crisis Core - Final Fantasy 7 - Wings Of Freedom (Master Mi Remix)". -
 Master Mi reacted to a post in a topic:
Have the tagging functions and features for categorizing the progress of a posted remix on OCRemix been removed?
Master Mi reacted to a post in a topic:
Have the tagging functions and features for categorizing the progress of a posted remix on OCRemix been removed?
-
Master Mi reacted to a post in a topic:
HAPPY 25th BIRTHDAY, OC ReMix!
-
@DarkeSword Big thanks. )) I forgot another question. There was also some kind of an off-topic forum here on OCRemix some time ago. Has this also been removed - or is this hidden somewhere and has been integrated into another forum section?
-
Master Mi reacted to a post in a topic:
Have the tagging functions and features for categorizing the progress of a posted remix on OCRemix been removed?
-
I had just posted a new video game remix on OCRemix after a few years (in the “Post Your Game ReMixes!” forum) and wanted to take the opportunity to update the old tags for the remix, which were still there. But somehow you don't seem to have access to them anymore - or is the tagging function just a bit hidden now? I was a bit confused, as you can still search for tags in the search function on the site. ... The second thing is this. Years ago, when you posted a video game remix, you could indicate the current status or progress of the remix. According to my memory, you could indicate things like “work in progress”, “ready for review” or “submitted” etc.. Has this also been rationalized away at some point - or is it just related to the restructuring of the site some time ago and will return at some point? ... It would be really nice if someone could give me a short answer and explain the changes I apparently missed. ))
-
Now, about 8 years later and with much more sophisticated composition, mixing and sound design skills in my musical repertoire, I have radically reworked the entire remix and would now like to present to you the results of my ambitions. I think one of the main reasons that inspired me to get back into this remix project these days was the release of the Playstation 4 remake of the game called “Crisis Core: Final Fantasy 7 Reunion”, which I mainly played in 2024 together with a good friend and enjoyed the really good story to the fullest once again. I had also set myself the goal of perfecting and demonstrating my continuously evolving dynamic mixing concept called “Life Force”. To do this, I primarily wanted to use my beloved Yamaha MSP3 studio monitors and finally mix my second larger and this time somewhat more epic soundtrack on them, whereby I ultimately decided on my Crisis Core remix. I hope you, and especially the fans of Crisis Core: Final Fantasy 7, like it. )) Here are the links for the new remix version 1.3: >>> or >>> https://www.nicovideo.jp/watch/sm44603368 >>> https://soundcloud.com/master-mi/crisis-core-final-fantasy-7 ---------------------------------------------------------------------------------------------------------------- This soundtrack is the newest (and maybe even the final) version of my remix for the original song "The Price Of Freedom" from the PSP game Crisis Core: Final Fantasy 7, which was originally composed by Takeharu Ishimoto. I haven't uploaded any new soundtrack or remix content of mine in the last two years because I've been particularly dedicated to developing my mixing concept, which I call "Life Force", to be able to present my compositions and remixes at a much higher level of quality. This mixing concept, which I have developed over the last years, is primarily aimed at bringing much more clarity, a more natural, organic sound, much better dynamics, more atmosphere and spatiality back into the mix through sophisticated depth gradation and unique mixing techniques. In order to achieve this, I mix all my soundtracks and remixes in accordance with the loudness standards of the European Broadcasting Union, which are set out in the EBU R 128 recommendation with a target loudness level of -23 LUFS (or -23 dB in the context of the full scale), a loudness level at which the level peaks and transients can run out completely relaxed and naturally without the need to use compressors or limiters, which are prohibited in my mixing concept anyway. This is roughly at the loudness level of many soundtracks from the early 80s and about half as loud as most soundtracks produced according to the rather unfavorable trends of today's music industry. My aim with my mixing concept "Life Force" is to bring back or even surpass the very good sound quality and high dynamics of the soundtracks from the early 80s and to breathe a little more "life" back into the music, regardless of the music genre. … But I have also developed my compositional skills over the last few years, which I wanted to show in this heartfelt remix project. Not only did I make the dynamics and playing style of the existing instruments much more lively, natural and artistically elevated, I also recorded numerous new instruments and composed completely new passages to deepen the atmosphere of the remix even further and steer it in more specific directions. The early musical part with harp, strings and bells is primarily intended to emphasize the heaviness, sadness and tragedy of the approaching death of the main character Zack Fair, while his girlfriend Aerith apparently also suspects this at this moment or has been told this by the planet itself. This part becomes a little more powerful a little later with the introduction of the acoustic guitar and a slightly more intense way of playing the instruments. The section with the brass instruments such as trumpets in combination with an almost fanfare-like solo trumpet, followed by powerful French horns, is intended above all to emphasize the heroic side of Zack's self-sacrificing final battle against a veritable superior force of hostile Shinra troops, which presumably saved the life of his friend and companion Cloud, who was still incapacitated at the time, suffering from severe Mako poisoning. A slight musical change then takes place with the new electric guitar part, which transforms the previous orchestral part of the remix into an increasingly intensifying power ballad, which, in addition to driving power chords, also contains very beautiful melodic electric guitar leads, piano arpeggios as well as a Spanish guitar, all of which together are intended to illustrate once again the extremely liberating feeling that the main character Zack might have felt at the end of his hero's journey. For the soundscape and the mixing of the electric guitars, I drew a little inspiration from the really atmospheric electric guitar sounds in the song "Everytime We Touch", sung by Maggie Reilly. And for the final part of the remix, I composed an additional harp section to symbolize the path of the inner heaven that Zack has obviously taken, because he has always pursued his big dream of becoming a real hero with his heart in the right place, without forgetting the high value of honour, friendship, helpfulness and humanity. … In this sense, the title of my remix "Wings Of Freedom" does not stand for any small-minded, money-focused libertarian ideas or for one-sided freedom without justice, but rather for the freedom of the heart within the power of the unleashed soul, which allows some people in difficult situations and hard times to take not always the easiest but the right path, which fully convinces them, literally flows through them and gives them wings. Perhaps this is also part of the mysterious gift of the goddess. ))
-
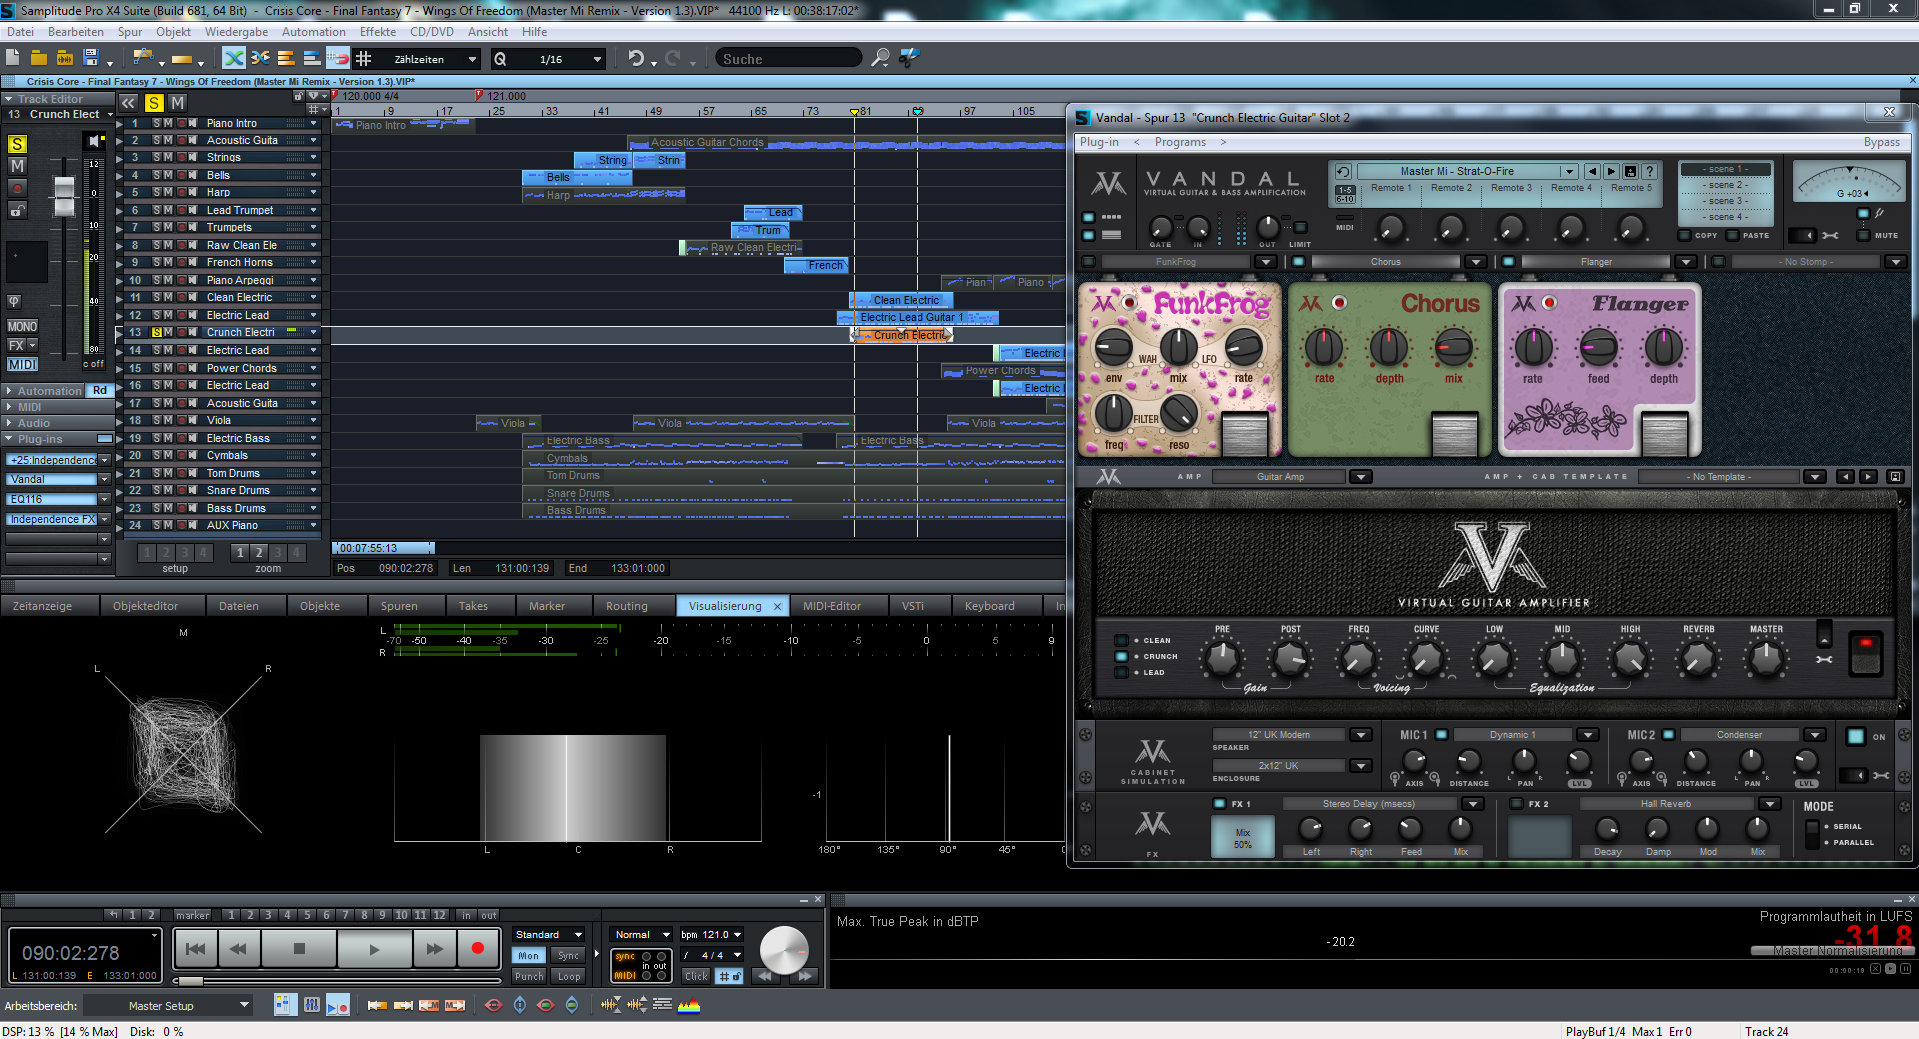
Enhanced sound experiment with mono/stereo signal sources and mono/stereo reverb effects ------------------------------------------------------------------------------------------------------------------------------------------------------------------- I've probably taken my time with this, although this undesirable lobbyist government in my country is also producing a lot of problems these days (to cut a long story short: neoliberal bullshit politics >>> approval of a really hefty 500 billion euros primarily for arms companies, the military and war >>> in return, massive austerity measures for public and municipal budgets as well as a considerable reduction in public contracts mostly for critical infrastructure and the most existentially necessary things >>> mass redundancies at companies, including mine, which had primarily specialized in public construction, planting and vegetation maintenance contracts >>> I was also laid off after no major construction contracts had been recorded since the beginning of the year and my company had only been able to pay wages in chunks for the last few months >>> yeah, it radically sucks... once again). But apart from the not entirely voluntary job search, I can at least take all my remaining vacation these days and, after creating 4 different versions of my Crisis Core remix and doing the final checks of the audio samples on various audio playback systems, I was also able to complete my long-announced sound experiment and present it to you now. … With this sound experiment, I wanted to investigate the extent to which mono and stereo signal sources as well as mono and stereo reverb effects can be used in different combinations in order to primarily improve the clarity and spatiality in the mix and thus further increase the mixing quality. I have examined four main variants and compared them in detail: 1) A mix of stereo and mono signal sources + stereo aux reverb sends 2) Mono signal sources + stereo aux reverb sends 3) Mono signal sources + mono aux reverb sends 4) A mix of stereo and mono signal sources + mono aux reverb sends I tried to reproduce the four versions as faithfully as possible, taking particular care to ensure that the positioning of the signal sources (i.e. the instruments in this case) and aux reverb effects in the panorama were all correct and that the loudness ratios between the signal sources and the aux reverb effects were maintained without significant changes. This was quite time-consuming precision work with extremely fine, often multiple loudness measurements for each track within each of these four versions. The final listening tests of the audio samples (four full-length soundtrack versions + the soundtrack excerpts presented here, as well as further mono compatibility checks of the four complete soundtrack versions + mono compatibility checks of the four soundtrack excerpts) on a variety of tested audio playback systems (Yamaha MSP3 studio monitors, Beyerdynamic DT 880 Pro studio headphones, Presonus Eris E4.5 studio monitors, a somewhat larger stereo system as well as a somewhat smaller, kitchen-radio-like stereo system or my HD MP3 player, for example) also really took a lot of time. But these detailed comparisons, for which I also made a few notes on clarity and spatiality in the mix as well as on special things with regard to the overall sound impression, have provided me with some really important insights that I will take into account in the future application of my dynamic mixing concept “Life Force” and which have given me further certainty that I am probably on the right path in this respect. … And so let's start right away with the first version: 1) A mix of stereo and mono signal sources + stereo aux reverb sends ------------------------------------------------------------------------------------------------------------------------- The track mainly contains signal sources or instruments in the stereo version (playing only on the outermost sides without further center participation in the panorama). I reduced a few signal sources (electric bass and kick drum) to centered mono signal sources to further improve clarity in the mix, while some other signal sources (all other drum elements) are present with a stereo width reduced to approx. 50% (playing between the outermost sides and the center in the stereo panorama, so to speak). All aux reverb effects are stereo in this version (but they only play on the outer sides without center participation). In the following audio sample, you can also hear the third and final electric guitar track for the previously mentioned part for the first time, which I wanted to compose in addition as part of my prior considerations (new electric guitar begins around minute 0:39 and plays on the left side in the stereo panorama) and which has really enhanced the electric guitar part and the overall sound ambience at this point: CC - FF7 Remix (Excerpt) - Stereo And Mono Source Signals + Stereo Reverb Version.mp3 As I had already used an electric lead guitar and a clean electric guitar for the big guitar part, I also wanted to use another individual setting for the third electric guitar. I decided on a crunch setting, for which I first experimented a little with a “Funk Frog” wah-wah effect. However, as this sounded far too playful in the context of the serious background of the soundtrack, I later deactivated this effect and instead used some really nice chorus and flanger effects in combination with the crunch setting, which made this electric guitar sound a bit more out of this world and also blended in really well with the soundscape of the other electric guitars. Here is a screenshot of this new electric guitar setting in my Vandal guitar amp plugin: After careful consideration, I also decided to use this first version of my mix as the new version for my remix, as I still find it to be the best overall package in terms of clarity, spatiality and the general sound quality of the mix, even after my extensive listening tests on various audio playback systems. Nevertheless, the following versions also have a few outstanding features that could be useful in certain mixing situations. 2) Mono signal sources + stereo aux reverb sends -------------------------------------------------------------------------------------- In this version, I used only mono signal sources (with a comparable positioning in the panorama as the previous stereo signal sources) and added an individual stereo reverb to each of them via aux sends in order to achieve a corresponding spatial effect, while at the same time trying to significantly increase the clarity of the mix: CC - FF7 Remix (Excerpt) - Mono Source Signals + Stereo Reverb Version.mp3 When listening on some audio playback systems, I actually had the feeling that this mixing approach was able to slightly increase the clarity in the mix in comparison to the first version. But on the other hand, this seemed to be at the expense of the spatial effect in the mix, whereby the connection between the playing instruments also seemed to get lost a little. 3) Mono signal sources + mono aux reverb sends ------------------------------------------------------------------------------------- After the seemingly minor improvements in clarity to the detriment of the spatial effect in the mix with the previous mono signal sources + stereo aux reverb send version, I naturally wanted to find out whether the clarity in the mix could be increased even further if you combine the existing mono signal sources with mono aux reverb instead of stereo aux reverb sends: CC - FF7 Remix (Excerpt) - Mono Source Signals + Mono Reverb Version.mp3 And indeed, I had the impression that at some points in the remix (especially in the large part with the three electric guitars) this increased the clarity in the mix a little bit and you could hear the individual instruments even more clearly. But on the flip side, the whole thing seemed to worsen the spatial effect of the mix even further, while the individual instruments seemed even more detached from each other and somehow disjointed. On some audio playback systems, the spatiality and reverb in the mix even seemed downright strange. I sometimes even had the impression that this mixing approach tore some holes in the stereo panorama and that the mix sounded very thin at some points (especially at the beginning of the audio sample, when there weren't quite as many instruments playing). Nevertheless, such a mixing approach with well-placed mono signal sources and mono aux effects could perhaps come into play if you are confronted with such a complex and extremely extensive mix, whose stereo panorama is already fully utilized or even radically overstuffed, for example in such a remix here, in which a large number of instruments and other signal sources play simultaneously at various points in the soundtrack: 4) A mix of stereo and mono signal sources + mono aux reverb sends ------------------------------------------------------------------------------------------------------------------------ For the sake of completeness, I still wanted to find out how the mix behaves if I simply combine stereo and mono signal sources with mono aux reverb sends, which then sounds like this: CC - FF7 Remix (Excerpt) - Stereo And Mono Source Signals + Mono Reverb Version.mp3 This doesn't sound bad either, but here too the spatial effect seems to suffer considerable losses, while the reverb also seems to sound somehow strange and to be downright dominated and drowned out in the interplay with the predominant stereo signal sources of the instruments. … So much for that. However, as promised, I also wanted to carry out a further mono compatibility check for these four different mixing versions as part of a more detailed examination. This can be done quite easily with a DAW by simply switching the master track (this contains all the individual tracks in the music project) to mono in the mixer view at the touch of a button in this master track, of course only temporarily for control purposes. This not only sets all tracks in the mix to mono sources, they are also centered in the stereo panorama, which means that a stereo width is non-existent, so to say. And this also means that all signal sources and effects are virtually superimposed and squashed in a centered point in the panorama. On the one hand, some sound engineers do this test to get a vague idea of how well the mix translates or reproduces on a mono audio playback device. On the other hand, by centering all available signal sources and tracks with the master track mono button, you can find out whether there are any gross frequency overlaps between the various signal sources and effects (can be fixed by the precise use of EQ plug-ins, for example) or even serious phase cancellations (which can cause some sound elements to literally drown out in the mix). But let's start right away with the mono compatibility control tests of the four tracks. M1) Mono compatibility check - a mix of stereo and mono signal sources + stereo aux reverb sends ---------------------------------------------------------------------------------------------------------------------------------------------------------------------------- CC - FF7 Remix (Excerpt) - Mono Compatibility Check - Stereo And Mono Source Signals + Stereo Reverb Version.mp3 M2) Mono compatibility check - mono signal sources + stereo aux reverb sends ------------------------------------------------------------------------------------------------------------------------------------------ CC - FF7 Remix (Excerpt) - Mono Compatibility Check - Mono Source Signals + Stereo Reverb Version.mp3 M3) Mono compatibility check - mono signal sources + mono aux reverb sends ----------------------------------------------------------------------------------------------------------------------------------------- CC - FF7 Remix (Excerpt) - Mono Compatibility Check - Mono Source Signals + Mono Reverb Version.mp3 M4) Mono compatibility check - a mix of stereo and mono signal sources + mono aux reverb sends ---------------------------------------------------------------------------------------------------------------------------------------------------------------------------- CC - FF7 Remix (Excerpt) - Mono Compatibility Check - Stereo And Mono Source Signals + Mono Reverb Version.mp3 … To summarize, I would say that even in the mono compatibility checks of the 4 versions, the first version with the well thought-out mix of stereo and mono signal sources and the stereo reverb aux sends performs best as an overall package. The first version not only convinces with a really good clarity and perceptibility of all instruments and effects in the mix, but also with a really good representation of the spatial depth and the spatial coherence of the sound sources. Once again, the second version with the mono signal sources and stereo aux reverb sends as well as the third version with the mono signal sources and mono aux reverb sends seem to perform slightly better in terms of clarity in the mix. Nevertheless, the instruments in these versions sound a little more static, a little less spatial and less coherent than in the first version, while the reverb also sounds a little strange in some places or even seems to overlay and dominate some instruments. The fourth version with the combined stereo and mono signal sources and mono reverb aux sends comes off worst here in my opinion, because this somehow strange and sometimes stalled-sounding reverb does least justice to my actual intention as a composer and sound designer. … Certainly, the differences between the four versions here are more in the range of nuances, since I was able to achieve the far more resounding improvements in the mix with some of the previous mixing approaches and sound experiments. But I believe that with this second major stereo and mono sound experiment and with the previous first stereo width sound experiment from December 20, 2024 (with the title: "Using specific stereo widths for instrument and direct signal tracks for more clarity and assertiveness in the mix and for a more impressive representation of panorama and spatiality in the soundtrack"), I was able to demonstrate quite well that you can not only clean up a mix in terms of frequency. You can also clean up a mix by making more efficient use of the panorama or by using different stereo widths for signal sources and aux effect sends in the mix, whether you turn critical stereo sources completely into mono sources or simply reduce the stereo width of some stereo sources so that other signal sources have more space in the stereo panorama in order to be better perceived in the mix. … But I'm still curious to hear your opinions on the subject and very interested to hear your listening impressions of the four different mixing approaches. )) … In my next and possibly last post on this topic within this thread for now (I want to throw myself back into the passion of composing), I will show you the full version of my new Crisis Core remix and, as a comparison, upload the previous version of this remix from about 8 years ago as an audio streaming file. Because that was about the time when I started to deal much more profoundly with the topics of composition, mixing and sound design in many smaller and larger steps, while about 12 years ago (around 2013), through a few lucky coincidences (one of which was the OCRemix community) and without any previous musical knowledge, I stumbled into the topic of DAWs & remixes and some time later took the first awkward but joyful and curious steps in this direction with my first version of a DAW. ))

-
Dunno, when I saw the new dark theme the first times, I thought that some kind of apocalyptic Kefka cult must have raided the peaceful OCR platform - just to plunge the colourful world of video game music into chaos, darkness and depression. But then I thought you're just following the legendary Japanese prophecy, aren't you? O_O ... Nah, just thought that the world could need much more light 'cause of the annoying weather (c'mon - only writing about it and it's just already raining like in late autumn again) and because the world got already dark enough for many people. But maybe I'll just hang up a bright and sunny picture with a really nice tropical motif in my living room next to my studio environment. This one has a really stunning paradisiacal ambience: Or maybe this one? I'm not really a designer with an additional degree in psychology. But I think you understand how strongly certain colors and motifs can influence people's thoughts and feelings. This was perhaps one of the reasons why the painter Vincent van Gogh, in a mentally unstable phase of his life, longed for much more light, sun and colors to capture them in his works and even moved his place of residence to the sunny south. So if you want to have a few ambient-heavy Chrono Cross and Star Tropics remixes again, or if you want to tempt all the remixers on OC to make some of these, you can use the picture motifs as a new (tropical sun) light theme after the prophesied battle against darkness is over. ))